Connecting your WooCommerce store with Mailchimp allows you to track all of your products and orders in Mailchimp. If you have our Premium e-commerce integration installed and activated, you can connect your shop in well under a minute.
First, go to MC4WP > E-commerce, which will take you to the following screen.
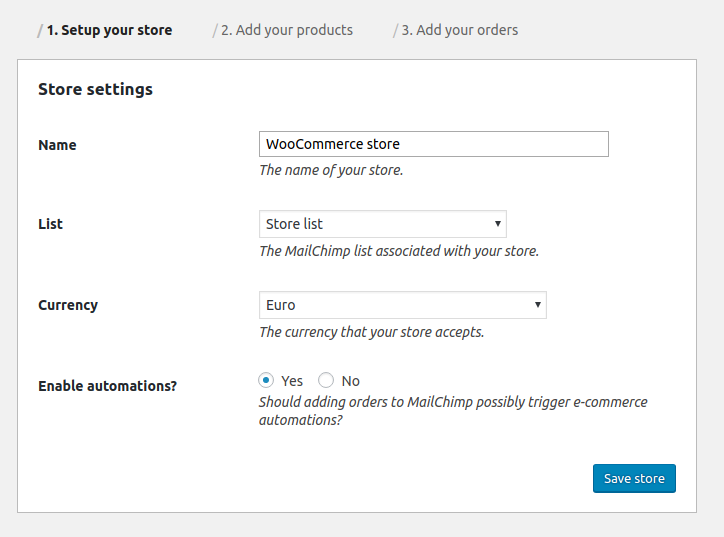
Here, select the Mailchimp list you would like to connect your WooCommerce shop with. If you are subscribing your WooCommerce visitors from your checkout, make sure you are choosing the same Mailchimp list there.
Choose a name for your store and set your preferred currency. Whenever an order comes in in a different currency than the currency you choose here, Mailchimp will automatically convert the amount to your preferred currency for all reporting. If you already have certain e-commerce automations configured in Mailchimp, it is probably a good idea to temporarily disable automations while you go about adding your products and orders to Mailchimp.
Clicking the “Save store” button will connect your store with Mailchimp and take you the next step, adding your products.
Verifying connected sites in Mailchimp
If you want to verify whether your site has correctly connected with Mailchimp, you can verify this on the Account > Connected Sites page in Mailchimp. Here’s what that page looks like for a freshly connected WooCommerce store.
